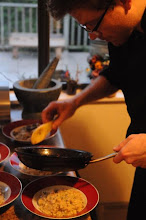
Just in case you want to try fried chicken that is made from real chicken, not the Colonel's patented doppel-poultry. I used Thomas Reid cornish hen.
There are many delicious variations on this idea: this recipe may not take the gold medal, but its definitely the simplest, which certainly puts it on the podium.
You'll need:
chicken (breasts, thighs, drumsticks; wings require a different procedure to be both crispy and juicy)
egg
milk
flour
salt and pepper
sunflower oil (I prefer it to corn or canola, since these crops are very often GMOs. Sunflower crops... a bit less often.)
do this:
Put 1L of the oil into an 8” pot, set to medium heat. This is enough oil for a shallow fry, which just means that you'll have to flip the chicken a couple of times. If you want to deep fry, use 2L. Not much difference. Set the stove to medium.
Beat the egg in a bowl and add some milk. I used 1 egg to about ½ cup milk. The more milk you use, the less flour will stick and the lighter the batter will be.
Add some salt and pepper to the flour, in a bowl, until it tastes a little salty and peppery. This is just to season the chicken, so this is where you'd want to add your own secret blend of herbs and spices. I think good quality chicken is its own secret blend of herbs and spices – the ones they ate in the pasture.
Dredge your rinsed and dried chicken breast into the flour bowl, then coat it in the egg-milk, then back into the flour. Here, you'll be well advised to press the flour into the chicken skin and make sure it is 100% coated. You want to create a starchy shell that entirely encapsulates the meat, to keep the juices inside (and out of the oil, where juices cause spits and pops). The shake-n-bake, toss-it-in-a-ziploc-bag, Rachel Ray method of easy fried chicken makes shitty fried chicken. Take your time on the little things.
(this is golden... breasts may be done now)
Once your chicken is coated, test the oil with a small piece (I use a tender, the muscle group that is loosely attached to the breast). You want to see the oil bubbling rapidly, but not violently. If it is bubbling violently, take the pot off the heat and add a few pieces to the pot, filling it but not crowding it. This will cool it down, and when they are frying happily, you can return it to the heat. You might have to turn down the stove. Conversely, if it bubbles too slowly, you might just have to wait for the stove to heat up, or your stove's thermostat might be running cold, so you'll have to kick your heat up one or two notches. The goal is to achieve the kind of happy bubbles I've captured photographically.
Every few minutes, if you're shallow-frying, turn the chicken over. How long this will take depends on how big the chicken is, but when the batter starts to turn a deep golden colour, pushing on amber, take a piece out and slice into it to see if it's done. No more blood = done (although, I do like my thighs and drumsticks a little on the overcooked side – extra crispy!). Keep in mind: drumsticks and thighs will take longer than breasts.
Once you've pulled your cooked chicken out of the oil, sprinkle just a little bit more salt on it. Maybe some pepper. Essentially, season it one last time: straight out of the fryer is the very best time to season anything, the oil just soaks up flavor as it stops bubbling outward and retreats into the pores of the crispy batter, bringing any seasoning with it.
Voila: Home-Fried Chicken!
p.s. - save the oil for your next frying: after its cooled, just let it drip through a coffee filter, and it comes out crystal clear.


No comments:
Post a Comment